Clear photos help a reviewer identify a physical gift card without guessing. For a Nigerian seller, the first photo set should show the complete card, its denomination and region clues, plus matching purchase proof when available. Keep the redeemable code covered until the official secure process specifically requests it.
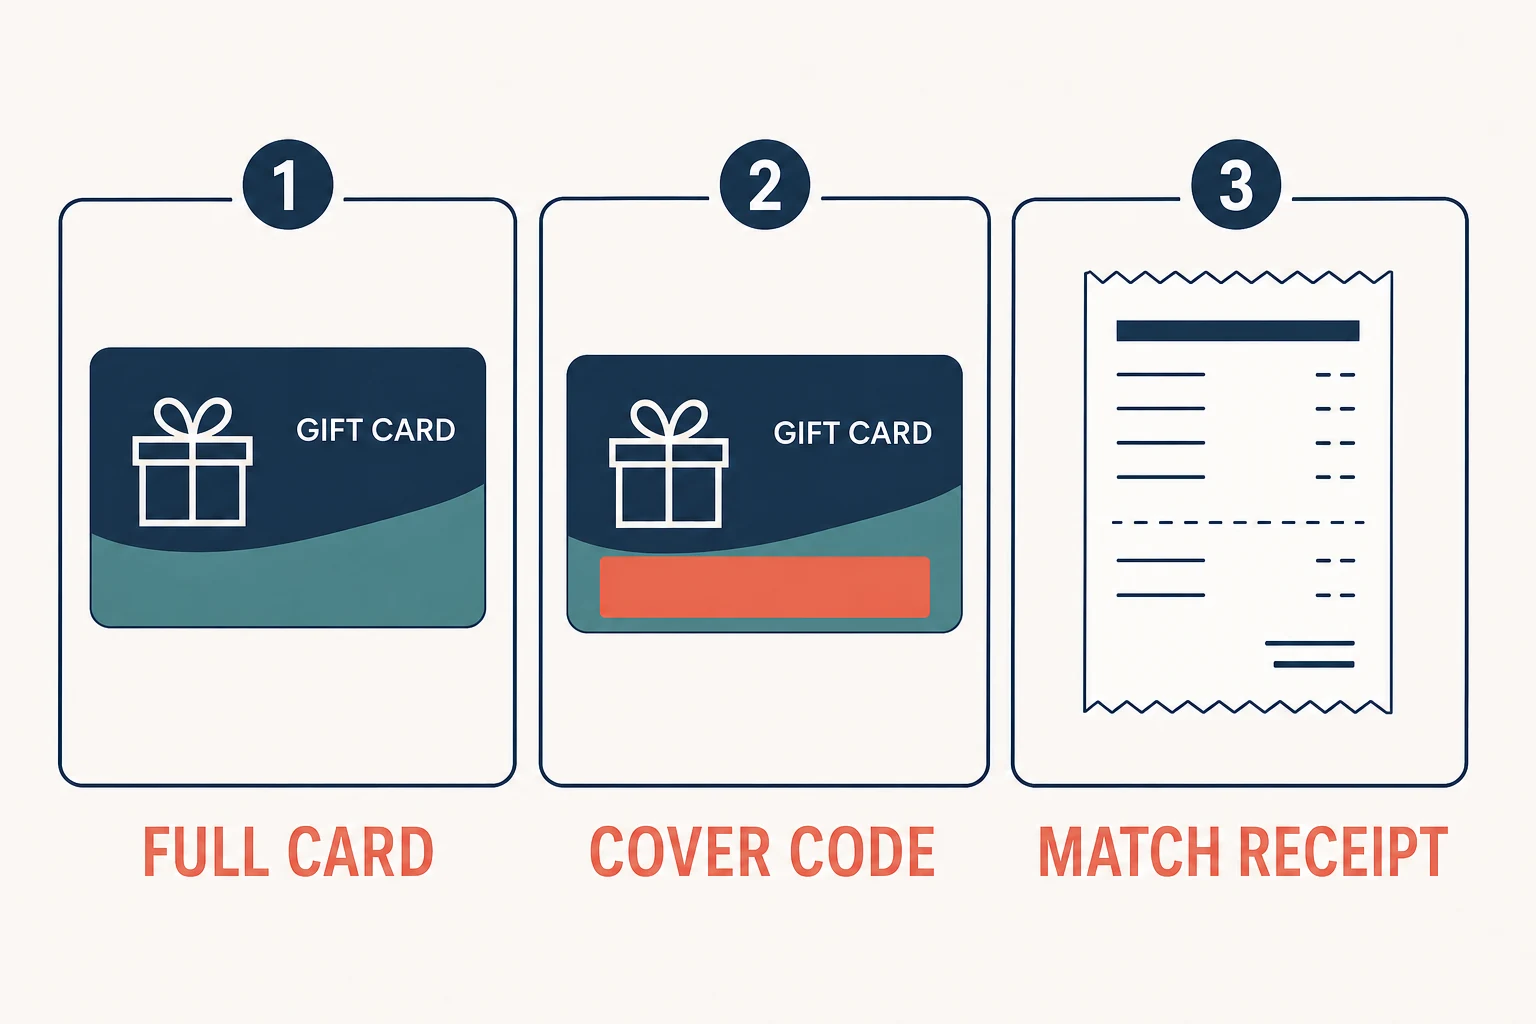
Photos to prepare for a physical gift card review
A useful first set normally contains a full front photo and a full back photo. Add a separate receipt image when you have purchase proof. If a small label, currency mark or serial area is unclear, take one close-up after the full-card views rather than replacing them with cropped details.
| Photo | Keep visible | Protect or avoid |
|---|---|---|
| Full front | Brand, design, denomination, currency or country clues, and all four corners | Glare, filters, fingers covering details, or a crop that removes the card edges |
| Full back | Card shape, printed terms and non-sensitive identifiers needed to identify the product | Redeemable code, PIN or full prepaid-card credentials before the secure submission stage |
| Detail close-up | One hard-to-read feature in sharp focus while the full view remains available | A detail-only set that gives no context for the complete card |
| Receipt or order proof | Retailer, gift card item, value, date and relevant transaction reference | Unrelated purchases, full payment-card data, home address or another card’s receipt |
How to take clear gift card photos
- Use even light. Stand near indirect daylight or use a bright room. Turn off harsh flash if it creates glare over the brand, value or receipt text.
- Choose a plain surface. Put the card on clean paper or a neutral table so the edges are easy to see.
- Hold the camera straight. A sharp overhead photo is easier to read than a steep angle that distorts the card.
- Include all four corners. Leave a small border around the card. Do not crop away the top, bottom or side edges.
- Check focus before sending. Zoom into the original photo and confirm that the brand, value and useful receipt fields are readable.
- Send original-quality files. Repeated forwarding or screenshots of screenshots can reduce detail.
Do not use filters or collages
Beauty filters, portrait blur, stickers and heavy contrast can hide printing or make colours unreliable. A collage may also shrink each card until the receipt and denomination are unreadable. Plain individual images are usually more useful than a stylised layout.
Keep the redeemable code protected
A photo can contain spendable value. Do not post the back of a live card in a public group or send the exposed code to an unverified contact. Cover the code area with an opaque piece of paper while keeping the rest of the card visible. Do not digitally paint over the only original photo; keep an unedited original for your records and create a protected sharing copy.
For broader handling rules, read CardFlow account security tips and the guide to preparing a gift card before selling.
Match the receipt to the correct card
A receipt can support the purchase history only when the useful fields connect it to the submitted card. Keep the retailer, date, Gift Card product line, value and relevant reference readable where available. Hide unrelated items and payment details on a working copy, but do not alter the facts used to match the purchase.
A receipt does not prove that a card is unused, guarantee that a route is supported or promise a better naira estimate. It is one part of the evidence a reviewer may consider.
When you have several cards
Photograph one card at a time and use simple labels such as Card 1 / Receipt 1 and Card 2 / Receipt 2. Record each card’s brand, country or currency, denomination and format in the same order. Do not place several cards over one receipt if the reviewer cannot tell which purchase line belongs to which card.
Copyable submission summary:
Brand: [brand]
Country/currency: [country and currency]
Value: [denomination]
Format: physical card
Proof available: [receipt or order record]
Code status: covered and not shared
Common photo problems and how to fix them
- Glare over the value: move the card away from direct light and retake the full view.
- Blurry receipt: photograph it separately, keep the camera parallel to the paper and tap to focus.
- Cropped corners: move the camera slightly farther away and leave a clean border.
- Wrong receipt: compare the retailer, value, date and reference before pairing the files.
- Exposed code: stop sharing that image and use a protected copy through the official process. Exposure can create risk; covering it later does not undo earlier sharing.
- Mixed batch: separate the cards, name the files consistently and attach one matching proof record per card.
The guide to common gift card submission mistakes covers additional proof and route errors that can lead to clarification or rejection.
What clean photos can and cannot establish
Clear photos can help identify the product, show its visible condition and connect it to purchase proof. They cannot by themselves confirm an unused balance, ownership, authenticity, eligibility or the final naira value. The exact card still has to follow the applicable verification and current route checks.
Prepare the evidence before requesting a current estimate, then describe the exact brand, country or currency, denomination and format. Do not rely on an old rate screenshot, and do not treat a preliminary estimate as a guaranteed payout.
Frequently asked questions
What photos should I take of a physical gift card?
Prepare a clear full front, a clear full back with the redeemable code protected, and a separate matching receipt image when purchase proof is available. Add a close-up only for a detail that is difficult to read.
Should I show the gift card code in the first photo?
No. Keep the redeemable code or PIN covered until the official secure submission process specifically requests it. Do not expose a live code in public or informal chat.
Does a clear receipt guarantee that my card will be accepted?
No. A matching receipt can support verification, but it does not guarantee authenticity, unused value, route availability, acceptance, a rate or payout.
Can I send one photo of several gift cards?
Separate images are clearer. Label each card and its matching receipt so the brand, value and purchase proof cannot be confused with another item in the batch.
Will better photos make a gift card payout faster?
Readable evidence may reduce clarification questions, but processing still depends on the exact card, current route, verification result and operational conditions. No photo set guarantees a completion time.
 Common Gift Card Submission Mistakes to AvoidJul 4, 2026
 How to Share Gift Card Details Safely in NigeriaJun 20, 2026
 How to Sell Gift Cards for Cash in Nigeria (2026 Guide)Jun 12, 2026